Difference between revisions of "Roster"
From RCampus Wiki
| Line 1: | Line 1: | ||
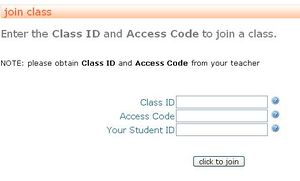
| − | The roster builder and management tools allow faculty to easily add students to a class roster and manage roster records. When a student joins your class through the ''' | + | [[Image:JoinClass.JPG|thumb|Roster is automatically created when students self-register]] |
| + | The roster builder and management tools allow faculty to easily add students to a class roster and manage roster records. When a student joins your class through the '''Join Class''' feature, the student's name is automatically added to the class roster. All you need to do next is simply update the student's enrollement status from '''pending''' to '''enrolled''', '''audit''', '''other''', '''dropped''', or '''blocked'''. | ||
Revision as of 19:01, 22 March 2007
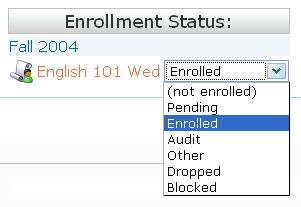
The roster builder and management tools allow faculty to easily add students to a class roster and manage roster records. When a student joins your class through the Join Class feature, the student's name is automatically added to the class roster. All you need to do next is simply update the student's enrollement status from pending to enrolled, audit, other, dropped, or blocked.
How to build a roster
The class must already be created. If not, create a new class by clicking New Class under classes menu.
- Select How to join side menu and give the instructions to your students.
- Click on rosters menu and select your class from a drop down menu.
- Click on a student's name, edit enrollement status and press save.
How to edit a student's status
- Select your class from the class list and select Roster side menu.
- Click on a student's name, edit enrollment status and press save.

