Difference between revisions of "Template:Insert an image"
From RCampus Wiki
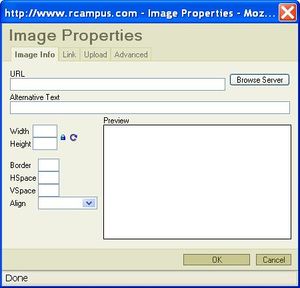
(New page: thumb|Image Properties dialog box will pop up # Position the cursor where you want to insert an image. # Select '''Insert/Edit Image''' (http://www.rcampus.co...) |
|||
| Line 8: | Line 8: | ||
The uploaded image is now showing on the page. Click on '''save''' at the bottom of the page. | The uploaded image is now showing on the page. Click on '''save''' at the bottom of the page. | ||
| + | |||
| + | |||
| + | NOTE: For optimal performance, shrink the size of your image first and save it as a separate file in your computer before uploading it. | ||
Revision as of 19:20, 10 May 2010
- Position the cursor where you want to insert an image.
- Select Insert/Edit Image (
 ) icon. This will open the Image Properties dialog box.
 - Click on Upload tab then the Browse button.
- Select an image from your computer and press [Open].
- Click on Send it to the server button. When a success notice pops up, press [OK]. You should see the selected image in the Preview box.
- Press [OK].
The uploaded image is now showing on the page. Click on save at the bottom of the page.
NOTE: For optimal performance, shrink the size of your image first and save it as a separate file in your computer before uploading it.
