Difference between revisions of "Upload pictures"
| Line 1: | Line 1: | ||
You can upload pictures and images to the header and web pages of your ePortfolios and website. | You can upload pictures and images to the header and web pages of your ePortfolios and website. | ||
| − | Make sure you are already logged into your ePortfolio / website first | + | Make sure you are already logged into your ePortfolio / website first in order to access the edit buttons. |
Revision as of 18:22, 8 September 2009
You can upload pictures and images to the header and web pages of your ePortfolios and website.
Make sure you are already logged into your ePortfolio / website first in order to access the edit buttons.
Contents
How to upload a picture/image to the header
Invoke the online editor
- Click on the edit button (
 ) located on top of the header.
Upload a picutre/image
- Position the cursor where you want to insert an image.
- Select Insert/Edit Image (
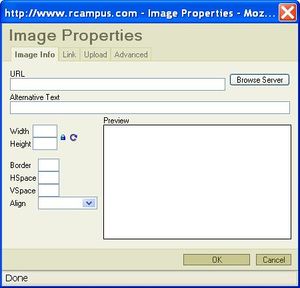
 ) icon. This will open the Image Properties dialog box.
 - Click on Upload tab then the Browse button.
- Select an image from your computer and press [Open].
- Click on Send it to the server button. When a success notice pops up, press [OK]. You should see the selected image in the Preview box.
- Press [OK].
The uploaded image is now showing on the page. Click on save at the bottom of the page.
NOTE: To display your image fast, first shrink the size of your image and save it as a separate file in your computer before uploading it. Large images take longer time to display.
How to upload a picture/image to a web page
Invoke the online editor
- Go to the page you want to build.
- Click on the edit button (
 ) located next to the page.
Upload a picture/image
- Position the cursor where you want to insert an image.
- Select Insert/Edit Image (
 ) icon. This will open the Image Properties dialog box.
 - Click on Upload tab then the Browse button.
- Select an image from your computer and press [Open].
- Click on Send it to the server button. When a success notice pops up, press [OK]. You should see the selected image in the Preview box.
- Press [OK].
The uploaded image is now showing on the page. Click on save at the bottom of the page.
NOTE: To display your image fast, first shrink the size of your image and save it as a separate file in your computer before uploading it. Large images take longer time to display.
See also
- Online editor
- Free Format
- Sliding Tiles
- Editor Tutorial: Learn how to do basic editing, insert images and links, and format text.
- Building content
- Upload pictures
- Editor Toolbar: Descriptions of toolbar icons
- Online editor FAQ
