Difference between revisions of "Rubric editor"
| Line 56: | Line 56: | ||
===Section weights=== | ===Section weights=== | ||
A section is designated by [[rubric rows|rubric divider rows]]. A section can be assigned an arbitrary percentage if needed. | A section is designated by [[rubric rows|rubric divider rows]]. A section can be assigned an arbitrary percentage if needed. | ||
| + | |||
| + | |||
| + | ==Working with an expanded view== | ||
| + | An expanded rubric gives more space for additional description. | ||
| + | |||
| + | Check a box next to '''Expanded view''' located above a rubric will produce description boxes and weight boxes. | ||
| + | |||
==Saving the rubric== | ==Saving the rubric== | ||
Select '''save''' or '''save and continue editing''' at the bottom of the screen. Your rubrics will be saved under [[my rubrics]] menu. | Select '''save''' or '''save and continue editing''' at the bottom of the screen. Your rubrics will be saved under [[my rubrics]] menu. | ||
| + | |||
| + | |||
| + | |||
| + | |||
==See Also== | ==See Also== | ||
Revision as of 02:43, 3 April 2008
This is the help page for our rubric editor.
Contents
Creating a rubric
Rubric title and description
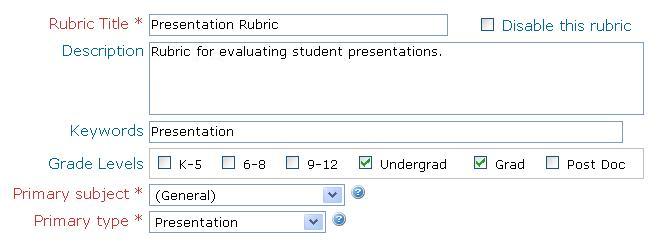
Enter a short title briefly describing the rubric in Rubric Title and a longer description in Description.
Allow others to use your rubric
To let others access your rubrics, please check the box to add the rubric to the gallery. Others cannot modify your rubrics but can copy them to their private galleries for use.
Rubric primary subject and type
You can assign a primary subject (e.g. English) and type (e.g. Assignment). Additional subjects and types can be assigned after the rubric is saved.
Working with rows
How to add a criteria row
Press the button labeled "criterion" at the bottom of the rubric. Learn more about criteria rows.
How to add a divider
Press the button labeled "simple divider" or "full divider" at the bottom of the rubric. Learn more about dividers.
How to move a row up or down
click on the up ( ) or down (
 ) arrow on the left of the row to be moved.
How to delete a row
Click on the delete button ( ) on the left of the row to be deleted.
Working with columns
How to add a level column
Press the button labeled "add level column" on the right of the rubric.
How to move a column left or right
click on the left ( ) or right (
 ) arrow on the top of the column to be moved.
How to delete a column
Click on the delete button ( ) on the top of the column to be deleted.
Working with weights
Level weights
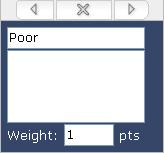
A level is a column in the rubric. Level weights are integral to a rubric and are required. They determine how each criterion is scored. A simple weight scale for levels would be 1, 2, 3, etc. with 1 being the poorest performance level.
Criteria weights
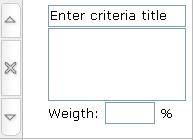
Criteria weights can be assigned to distribute the scoring among criteria. If no weights are assigned, all criteria will have an equal weight of 1 leaving the score determination to levels.
Section weights
A section is designated by rubric divider rows. A section can be assigned an arbitrary percentage if needed.
Working with an expanded view
An expanded rubric gives more space for additional description.
Check a box next to Expanded view located above a rubric will produce description boxes and weight boxes.
Saving the rubric
Select save or save and continue editing at the bottom of the screen. Your rubrics will be saved under my rubrics menu.
See Also
Learn More About Rubrics
- Rubrics at a glance
- Rubric terminology
- Rubrics for assessment
- iRubric - Enterprise Edition
- iRubric for LMS
- Etymology
Working with rubrics
- Building a rubric: Options for a new rubric
- iRubric Best Practices
- Rubric editor: Customize a rubric
- Rubric rows: Different types of rubric rows
- Disabling a rubric: How to disable or inactivate unwanted rubrics
- Assessment with rubrics: How to assess with rubrics
- My rubrics: List of your own rubrics
- Printing a rubric: Customizing how a rubric should print
- Rubric search tool: Search for rubrics using keywords
- Sharing a rubric: Print, embed, link & showcase your rubrics
- Rubrics FAQ
- Rubrics video tutorials: List of video tutorials related to iRubric
- Copyright and Citations Information
iRubric Public Tools
- iRubric Studio: Online rubric builder is available here
- iRubric Gallery: Collection of public rubrics built by our members is available here


