Roster
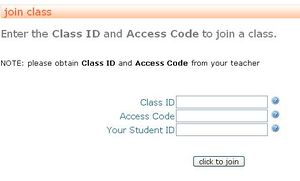
Our roster builder and management tools allow faculty to easily add students to a class roster and manage roster records. When a student joins your class through the Join Class feature, the student's name is automatically added to the class roster. All you need to do next is simply update the student's enrollment status from pending to enrolled, audit, other, dropped, or blocked.
Directly from the class roster, faculty can also do other class activities including sending teacher-student private messages and accessing a student grade card.
How to build a class roster
To build a class roster, students should be added to a class. See student registration for details.
Managing Roster
Faculty can use the roster management to change a student enrollment status or create a link between manually-added students to self-registered students. Manually-added students are the ones that were added by the teacher but are not linked to an actual user. Teachers need to link that record with a student that has self-registered to avoid duplicates in the roster.
How to link a manually-added student to a self-registered student
- From classroom top menu, select rosters.
- Select the class you want to access from the drop down list.
- Click on Manage Roster.
- Follow the instructions on the page to select a self-registered student for a record you had manually entered.
- Press [save].
How to edit a student's enrollment status
In the manage roster page, change the enrollment status of students and press save. See enrollment status for detailed information on various statuses.
Enrolling students
See How to build a class roster for detailed information.
Deleting students
Students cannot be deleted from the roster. However, they can be dropped or blocked by changing their enrollment status (see below).
Dropping students
To drop a student, set the enrollment status to 'dropped'. See enrollment status for detailed information.
Blocking students
To block a student that should not have access to the class, or a student that self-registered multiple times with different logins, set the enrollment status to 'blocked'. A 'blocked' status is different from 'dropped' status. See enrollment status for detailed information.
Adding students to multiple classes
Students must have already joined one of your classes in order to be added to your other classes.
- Open the roster for the class where the student has already joined.
- Click on the student name. This will open the student profile with a list of your classes at the bottom.
- Change the student's enrollment status to "enrolled" to add him/her to any other class.
- Press [save].
Other functions
Teachers can do other class activities directly from the class roster.
- Send teacher-student private messages.
- Access and enter student grades.
